Handmade Love Card
and Love Carriage
by Priyanka Mandal
(Kolkata,West Bengal, India)
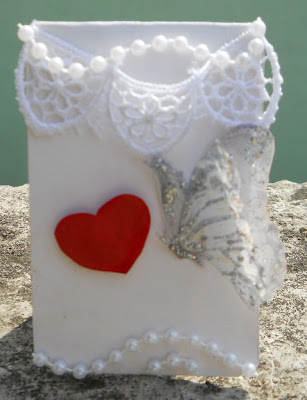
Handmade Love Card
For the Love Card
What you need to make this card:
- Cardstock for your card’s base
- Vellum Paper
- Water color in red and white
- Pearls chain,lace.( Pearls chain from Mama, love you)
- Butterfly stamp(It is from my aunt Sue, love you too)
- Foam tape
- 3D glitter
- Glue
Step 1
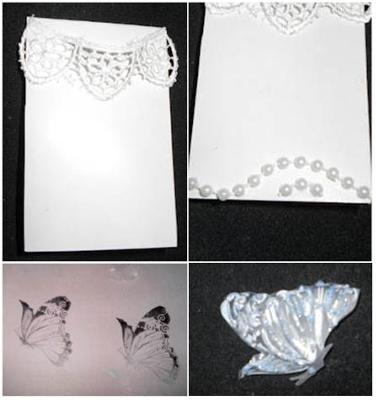
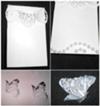
Take a strip of lace and glue it on the upper part of your cardstock just like how you would position a banner.
Step 2
Next, take your pearls chain and attach it to the bottom part of your card. As this pearls chain lace take its own shape, I first created a path using the glue so that the pearls will simply follow that path.
Step-3
I cut out small heart piece from vellum paper and colored it out with red water color.
Step-4
I stamped out two butterfly images on vellum paper and cut them out and then colored them with white water color. A little head’s up: when you color this your vellum paper will shrink. Don't worry, when it dries up, stretch it back to its original shape. I also add 3d glitters on it.
Step-5
I then cut out another piece of butterfly and put some gillter on it and attached both butterflies together. Only glue the body portion together so it looks 3D :)
Step-6
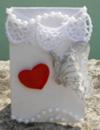
I attached the red heart on my card with foam tape or pop dots. And then I attached the butterfly to the side of this heart so it seems that the butterfly is coming to land on your heart.
Step-7
And finally I attached a pearls string above the lace as a finishing touch!
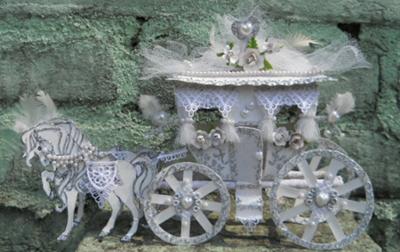
For the Love Carriage
Materials used:
- Scissors
- Precision knife or craft knife
- Two long sticks (24 cm & 6cm) & a ice cream stick or popsicle stick
- Glue
- Color and brush (optional, if you like to color your carriage)
- Lace, tutu, flower, feather and beads( or whetever you want for embellishments)
- 3D glitter
- Heavy Card Stock (Really essential)
Step 1
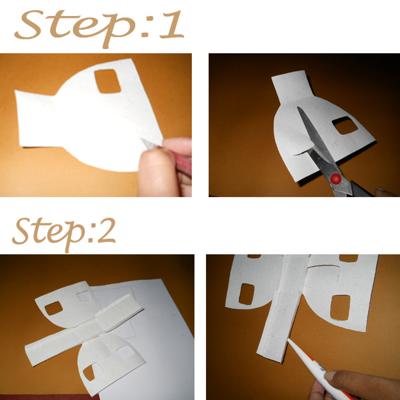
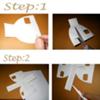
I used a template for my carriage and carefully cut it out using a precision knife. For the windows, you can cut a small portion of a window just enough so your scissors can cut through the rest of the window.
Step 2
I followed the template's instructions to cut and fold the floor and glued together at the side.
Step 3
I folded the roof. With the help of a precision knife, I cut at the middle of the floor just enough to insert the ice cream stick.
Step 4
I cut small piece of paper and arranged them and placed the round frame above it. (Or you can cut out entire wheel from the template) Your wheel is ready.
Step 5
Well, to decorate my window I made small curtain by tutu, I cut this out according to the height of my window and tied at its middle,glue some beads on the thread.
Step 6
Now you decorate your roof separately and body separately, and attach stick below the body so it can hold the wheel. Well I wrap some lace around the stick so it looks good. And also I wrap paper around the end of the small 6 cm stick to hold my wheel.
Step 7
Ok next I printed out and cut out (Horse pic size I have taken 4”) the horse (from here http://freekidscoloringpages.net/horse-coloring-pages.php) and I decorate it with 3D glitter, beads and Lace and keep it aside.
Step 8
Then I attach a long folded paper strip at the middle of the front 6 cm stick to hold the horse cart driver seat straight and over it I placed the folded decorated seat. And glue its back side with the body.
Step 9
Now glue your horse on the long stick according to the height of the wheel, means your horse leg and wheel end will be the same line other wise it will not stand.
Step 10
And finally I attach the decorated staircase at the gate to get down from the cart. And my cart is ready.
Tips: You can keep your roof open so you can put a small lamp inside it so its look more romantic, or you can put a small note inside it to tell your dear one how much you love him or her.
Please visit my blog, My Hobby is My Heaven for the templates and more photos and details.
