Gorgeous Anniversary Card Ideas
If you're searching the net for Anniversary Card Ideas, your search is over. :) We've got those and more! All our card ideas come with tutorials and lots of photos to keep you inspired during your crafting time! Today we have DT Member Aileen to show you how to make one for the occasion.
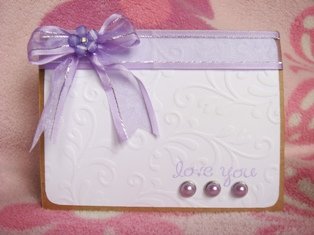
"Love You" Anniversary Card
By Aileen Garcia
A guy friend of mine requested that I make a card for his girlfriend for their anniversary. Typical guy, when I asked what he wants the card to look like, he said he doesn’t know squat about cards and that he’s leaving it all up to me. It’s hard to make a card for someone you don’t know, since you don’t know what will make them happy. If you ever find yourself in a similar situation, my friends, ask for just one thing – the recipient’s favorite color! Hey, anyone would be happy to get anything in their favorite color, right?? Luckily, this boyfriend knows! And, it’s purple. So, without me knowing much about his girlfriend, wracking my brains for anniversary card ideas, I just worked around on what I knew, and this is what this card is about.
For this color coordinated card, you’ll need the following:
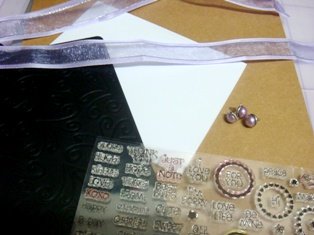
- Brown craft cardstock
- White cardstock
- Ribbon (purple)
- Pearl brads (purple)
- Embossing Machine and Texture Plate (Lovely Flourish)
- Corner Rounder
- Stamp for the sentiment (and purple ink, of course)
- Small circle puncher (ticket puncher)
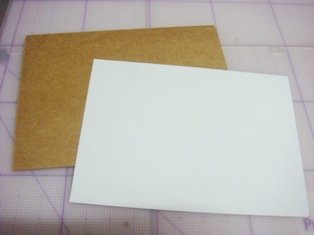
- Score and fold a 4.25 x 11 craft paper in half.
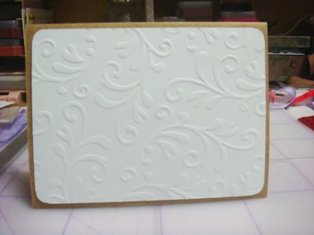
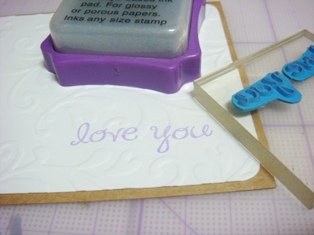
- Emboss the texture plate on a slightly smaller white cardstock. (I tell you, embossing gives a card a different level of sophistication! And it’s so very easy to do!)
- Adhere the embossed cardstock in front of the card.
- Stamp your sentiment at the lower right portion of the card.
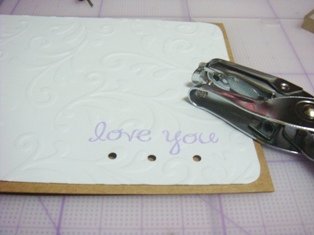
- Identify the center of the sentiment, and slightly below, punch a hole through. (Make sure to only punch the front of the card and not include the back part.) Punch one more hole a few centimeters to the left and to the right.
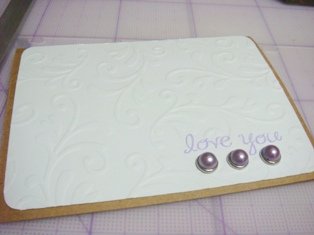
- Place the brads on these holes. (Pearl brads give a sophisticated look, too! Don’t you agree?)
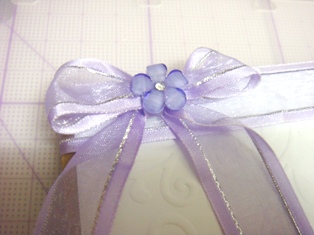
- Adhere the ribbon on top of the card. Using the same ribbon, make a bow.
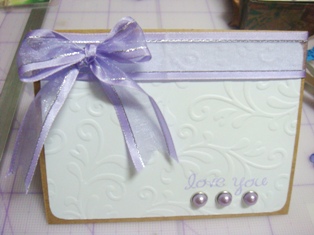
- Because I am not the best in ribbon-making, just to give the bow a “clean” look, I adhered a small, color-coordinated flower to cover the knot.
- Enjoy your card!

More Anniversary Card Ideas
Let's Make Greeting Cards Homepage